
Many thanks to Bandit for being a very, very patient model.
Cosplay - the practice of recreating the costumes and props of characters from movies, books, or video games.
While cosplay doesn’t have to be an exact replica of a character, I aim to make my costumes as close to the original as possible. This can be quite challenging for several reasons.
First, many characters are animated, meaning that not all angles of their costumes are visible. I have to interpret the animated fabrics and find similar materials. Additionally, since many costumes don’t have existing patterns, I often need to modify similar patterns or create my own from scratch.
Second, some props or elements that characters have may not actually exist or may be physically impossible to recreate as they are depicted in the show. Therefore, I need to devise props that resemble the original while using different techniques to conceal the structural elements that allow them to function properly.
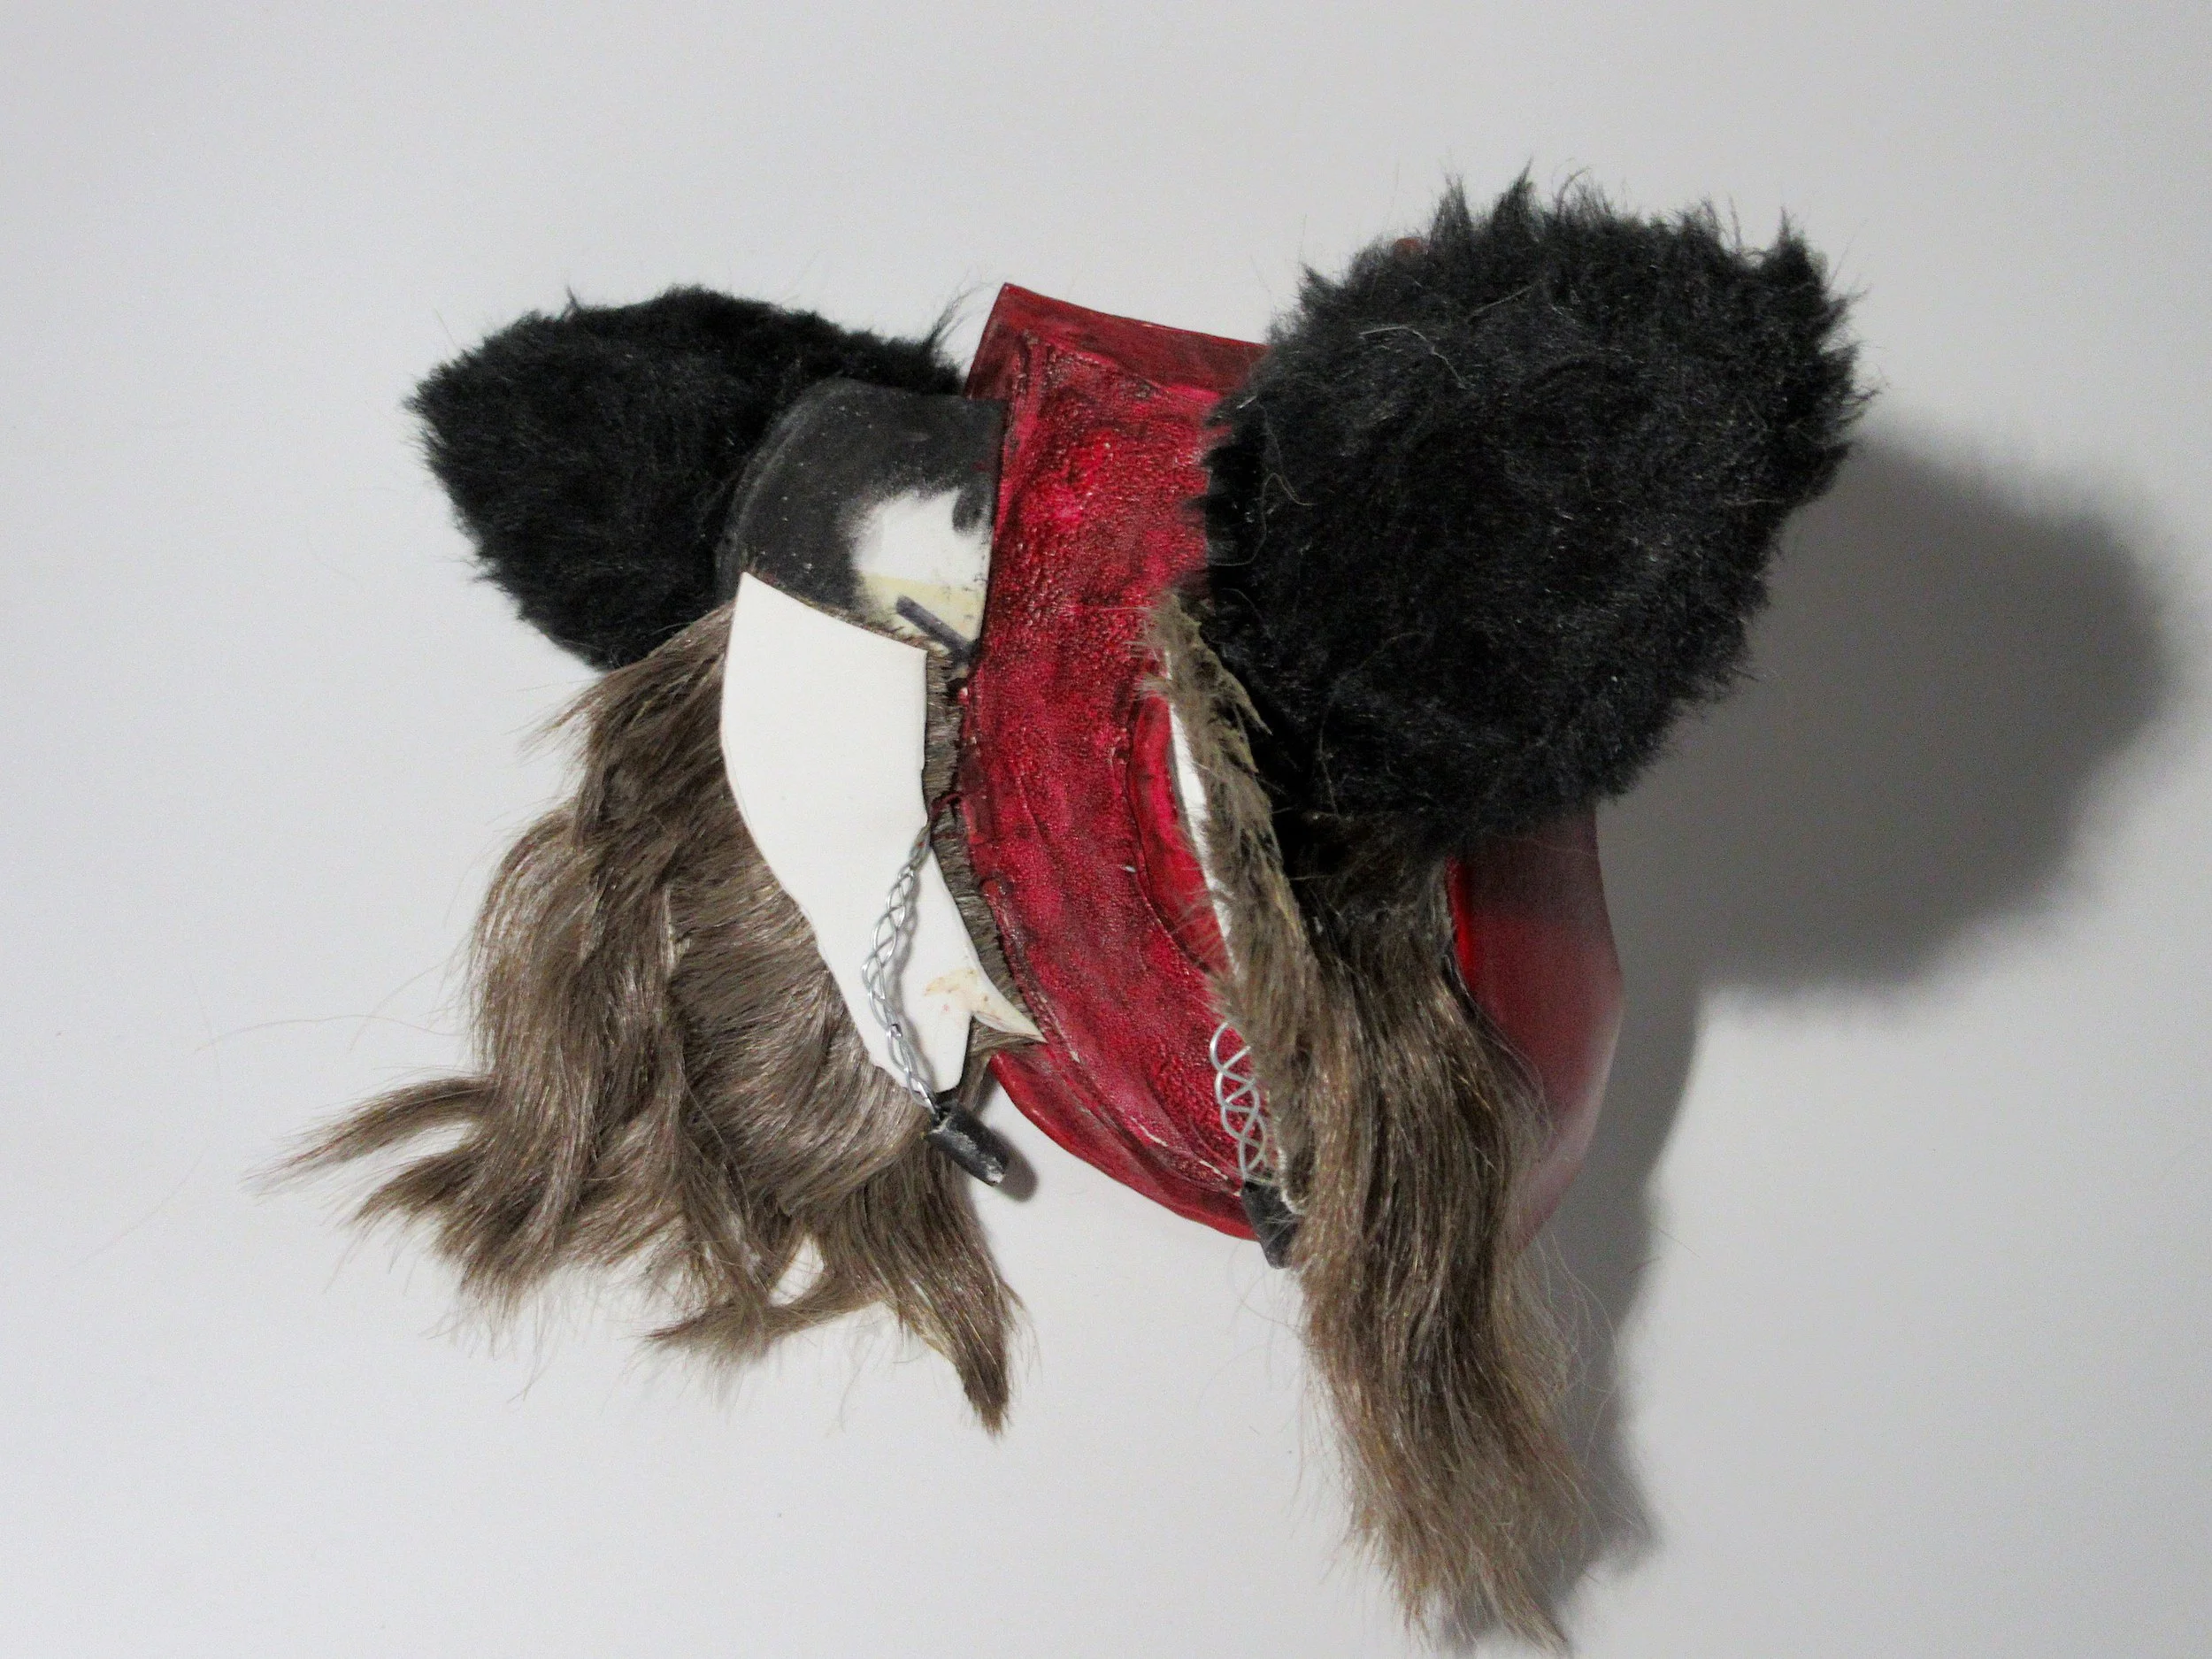
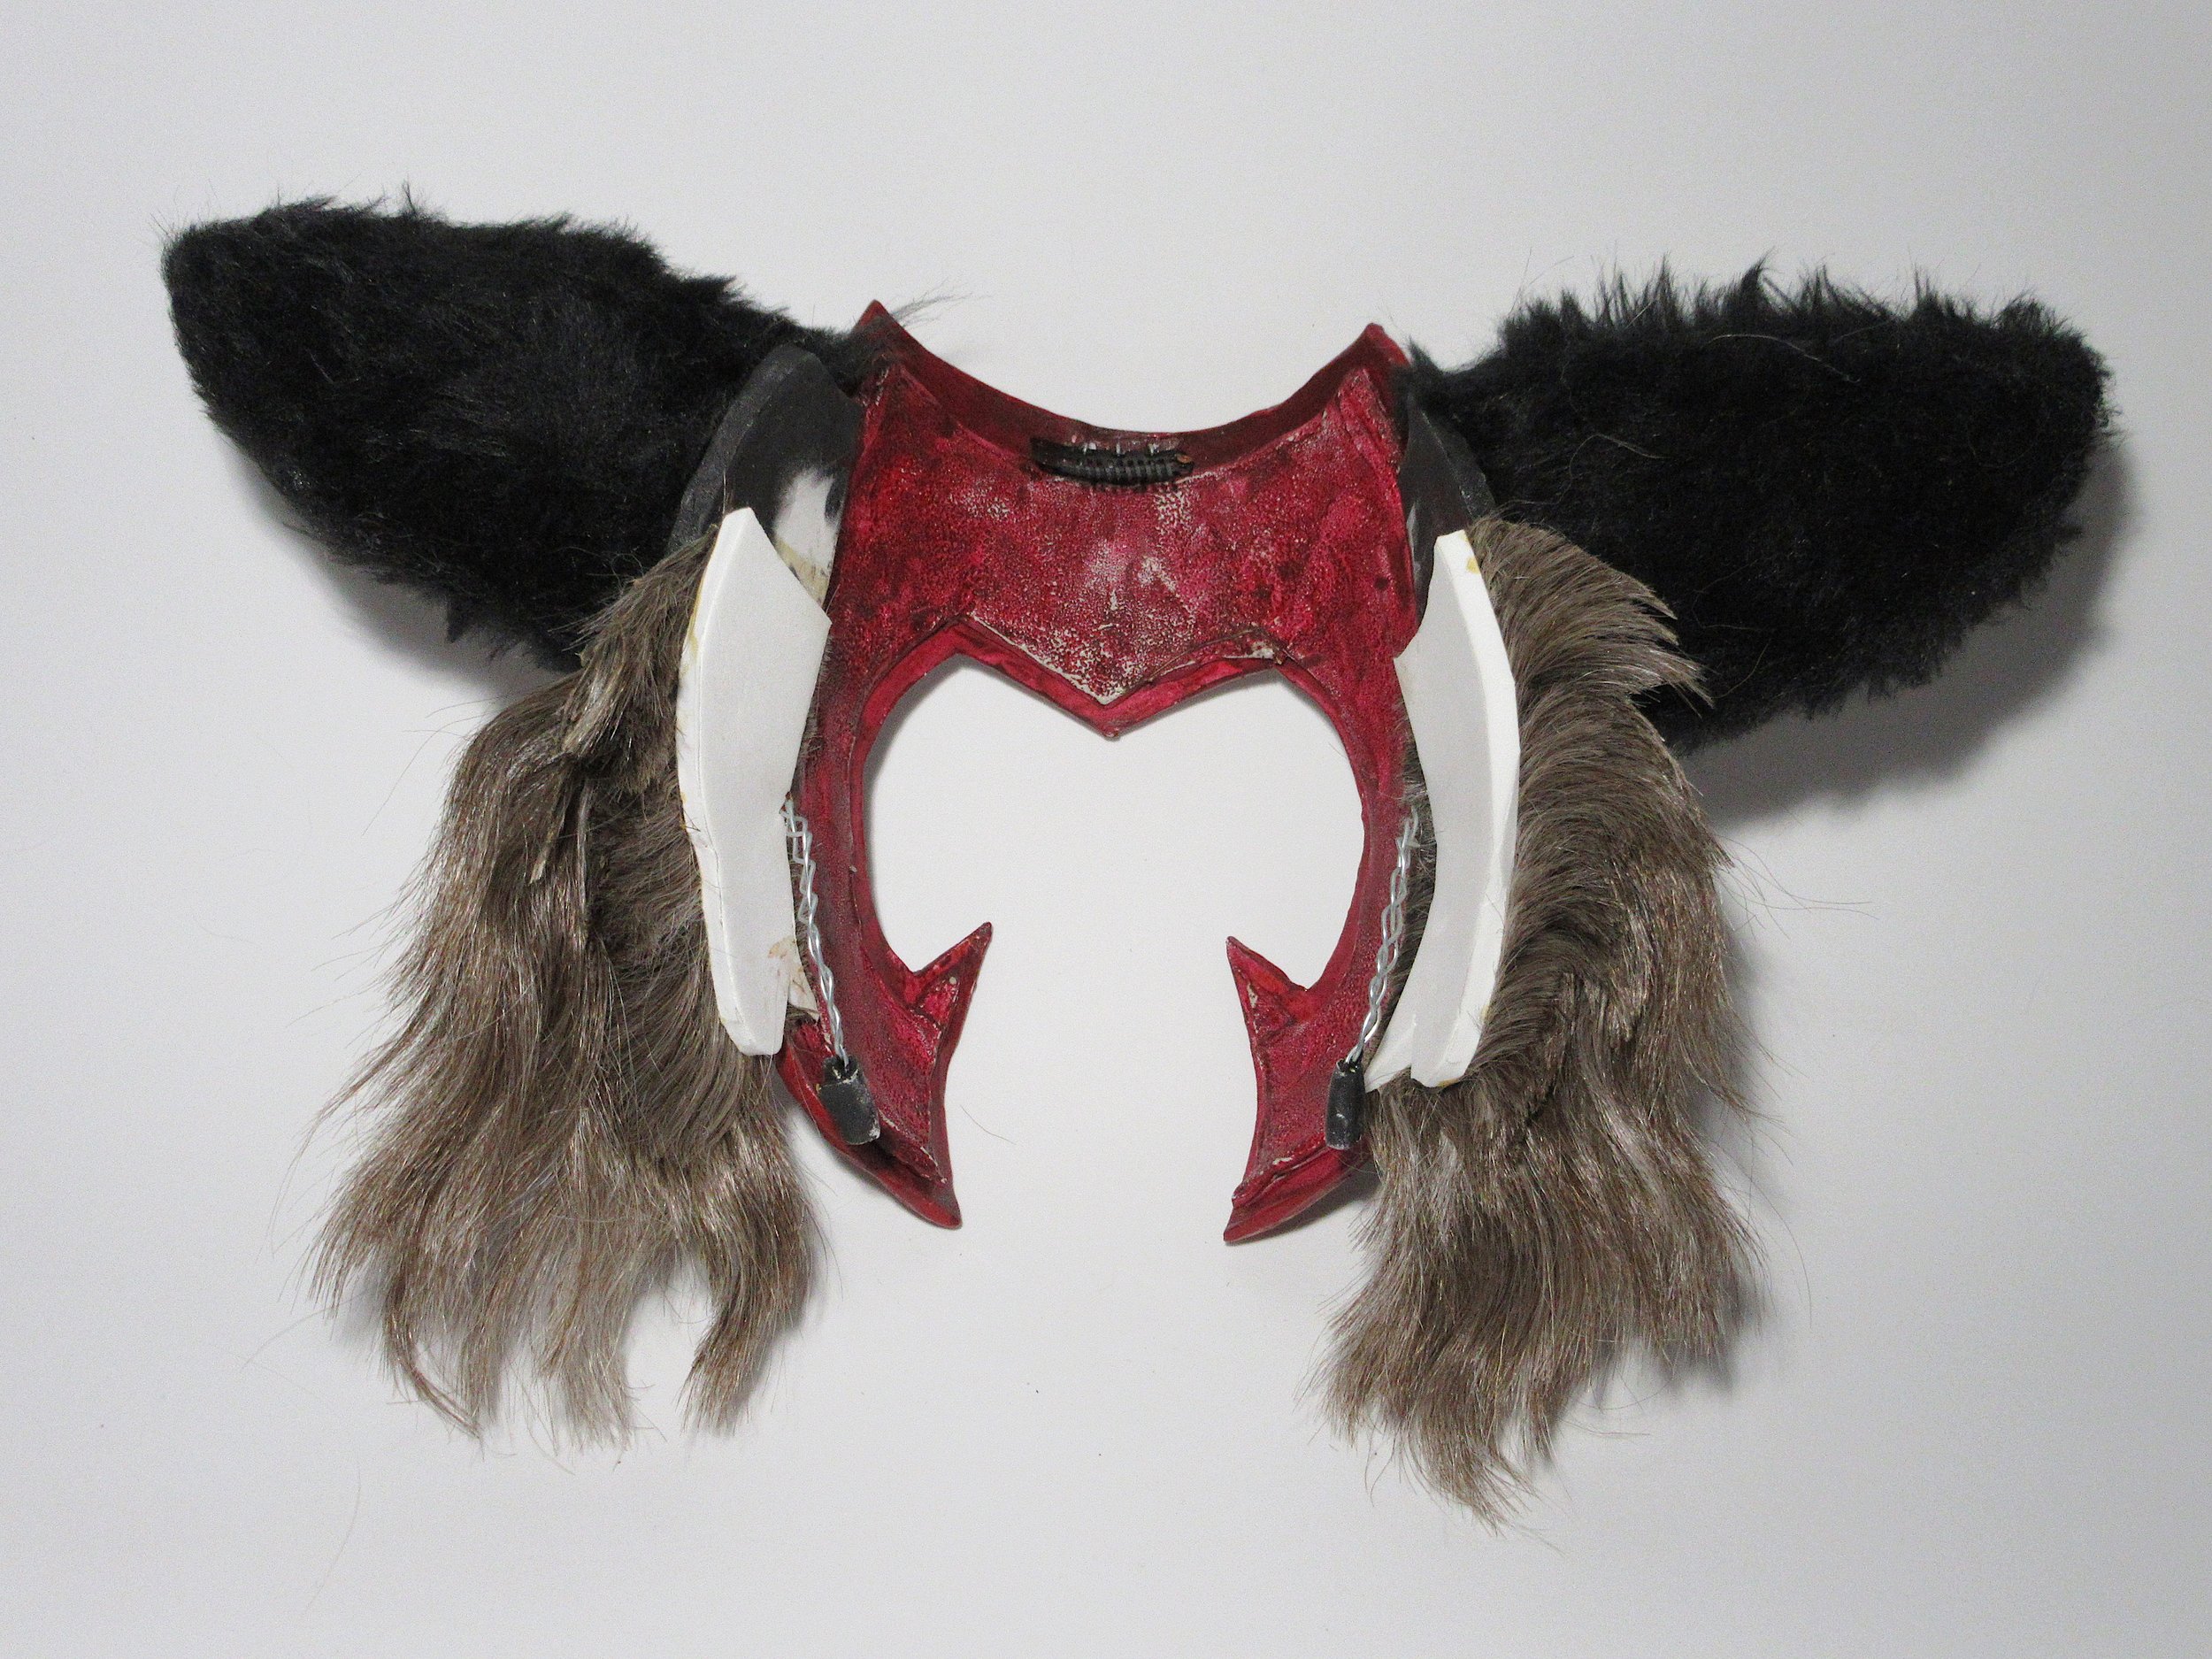
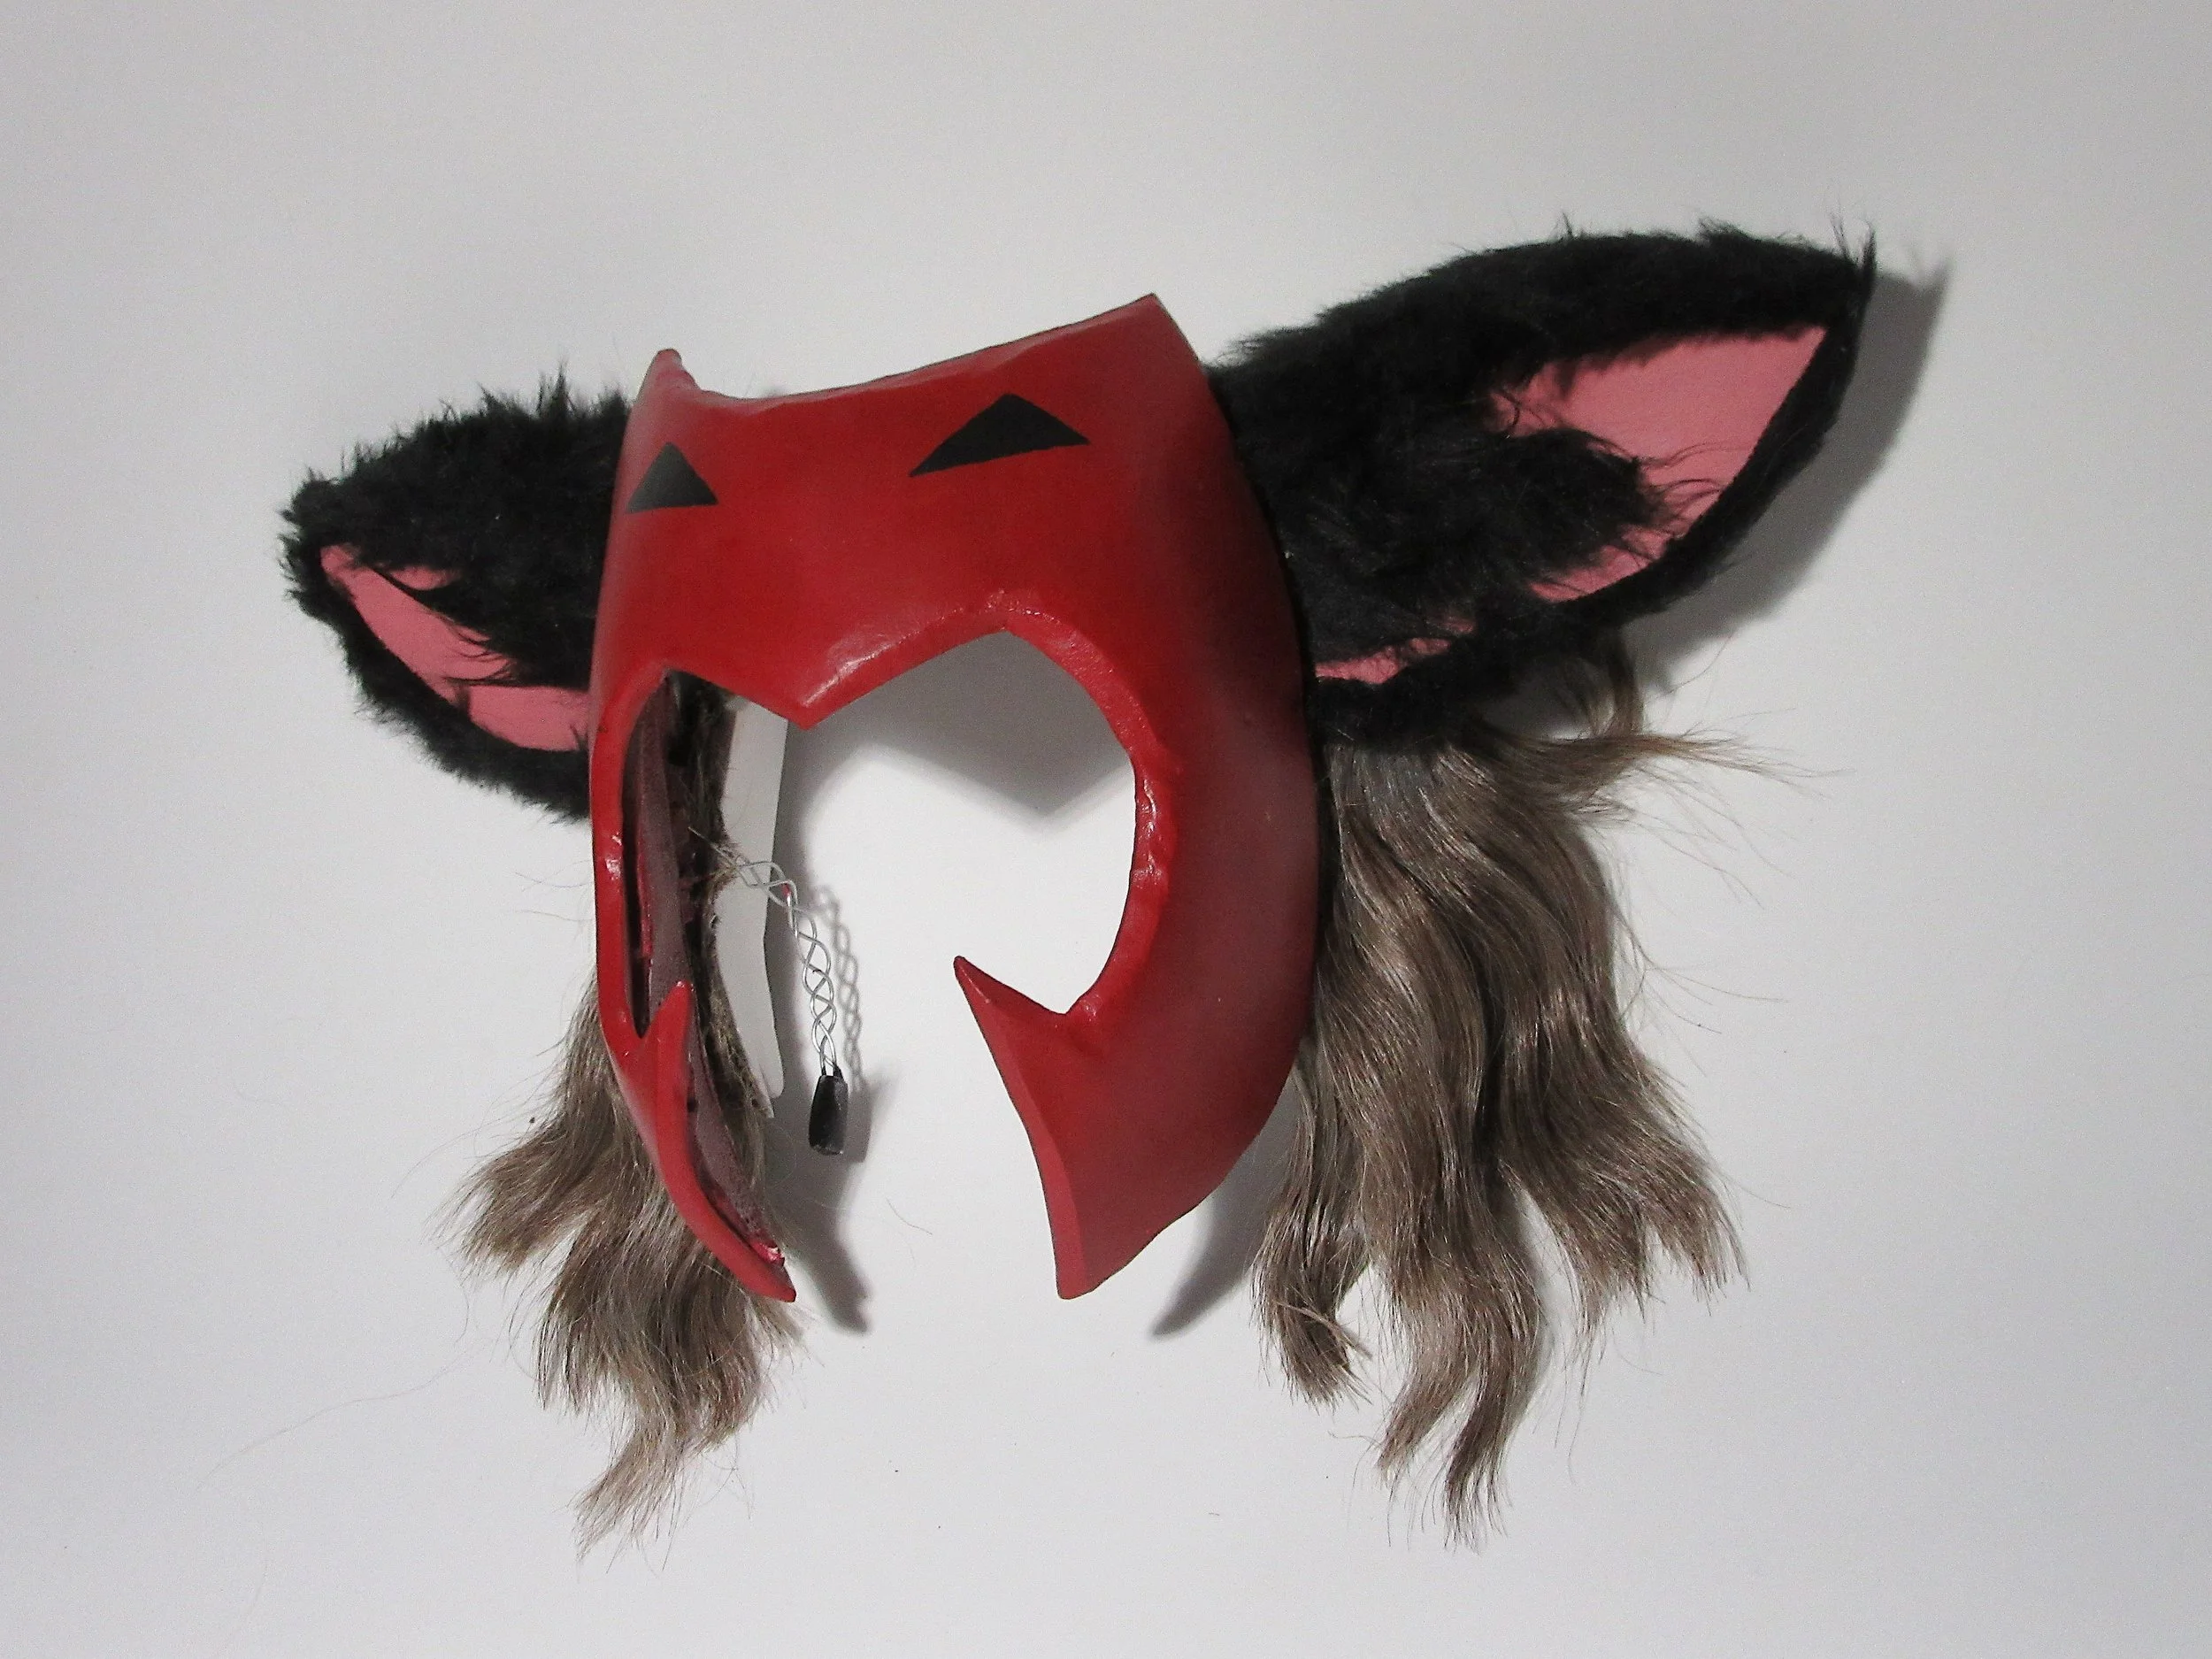
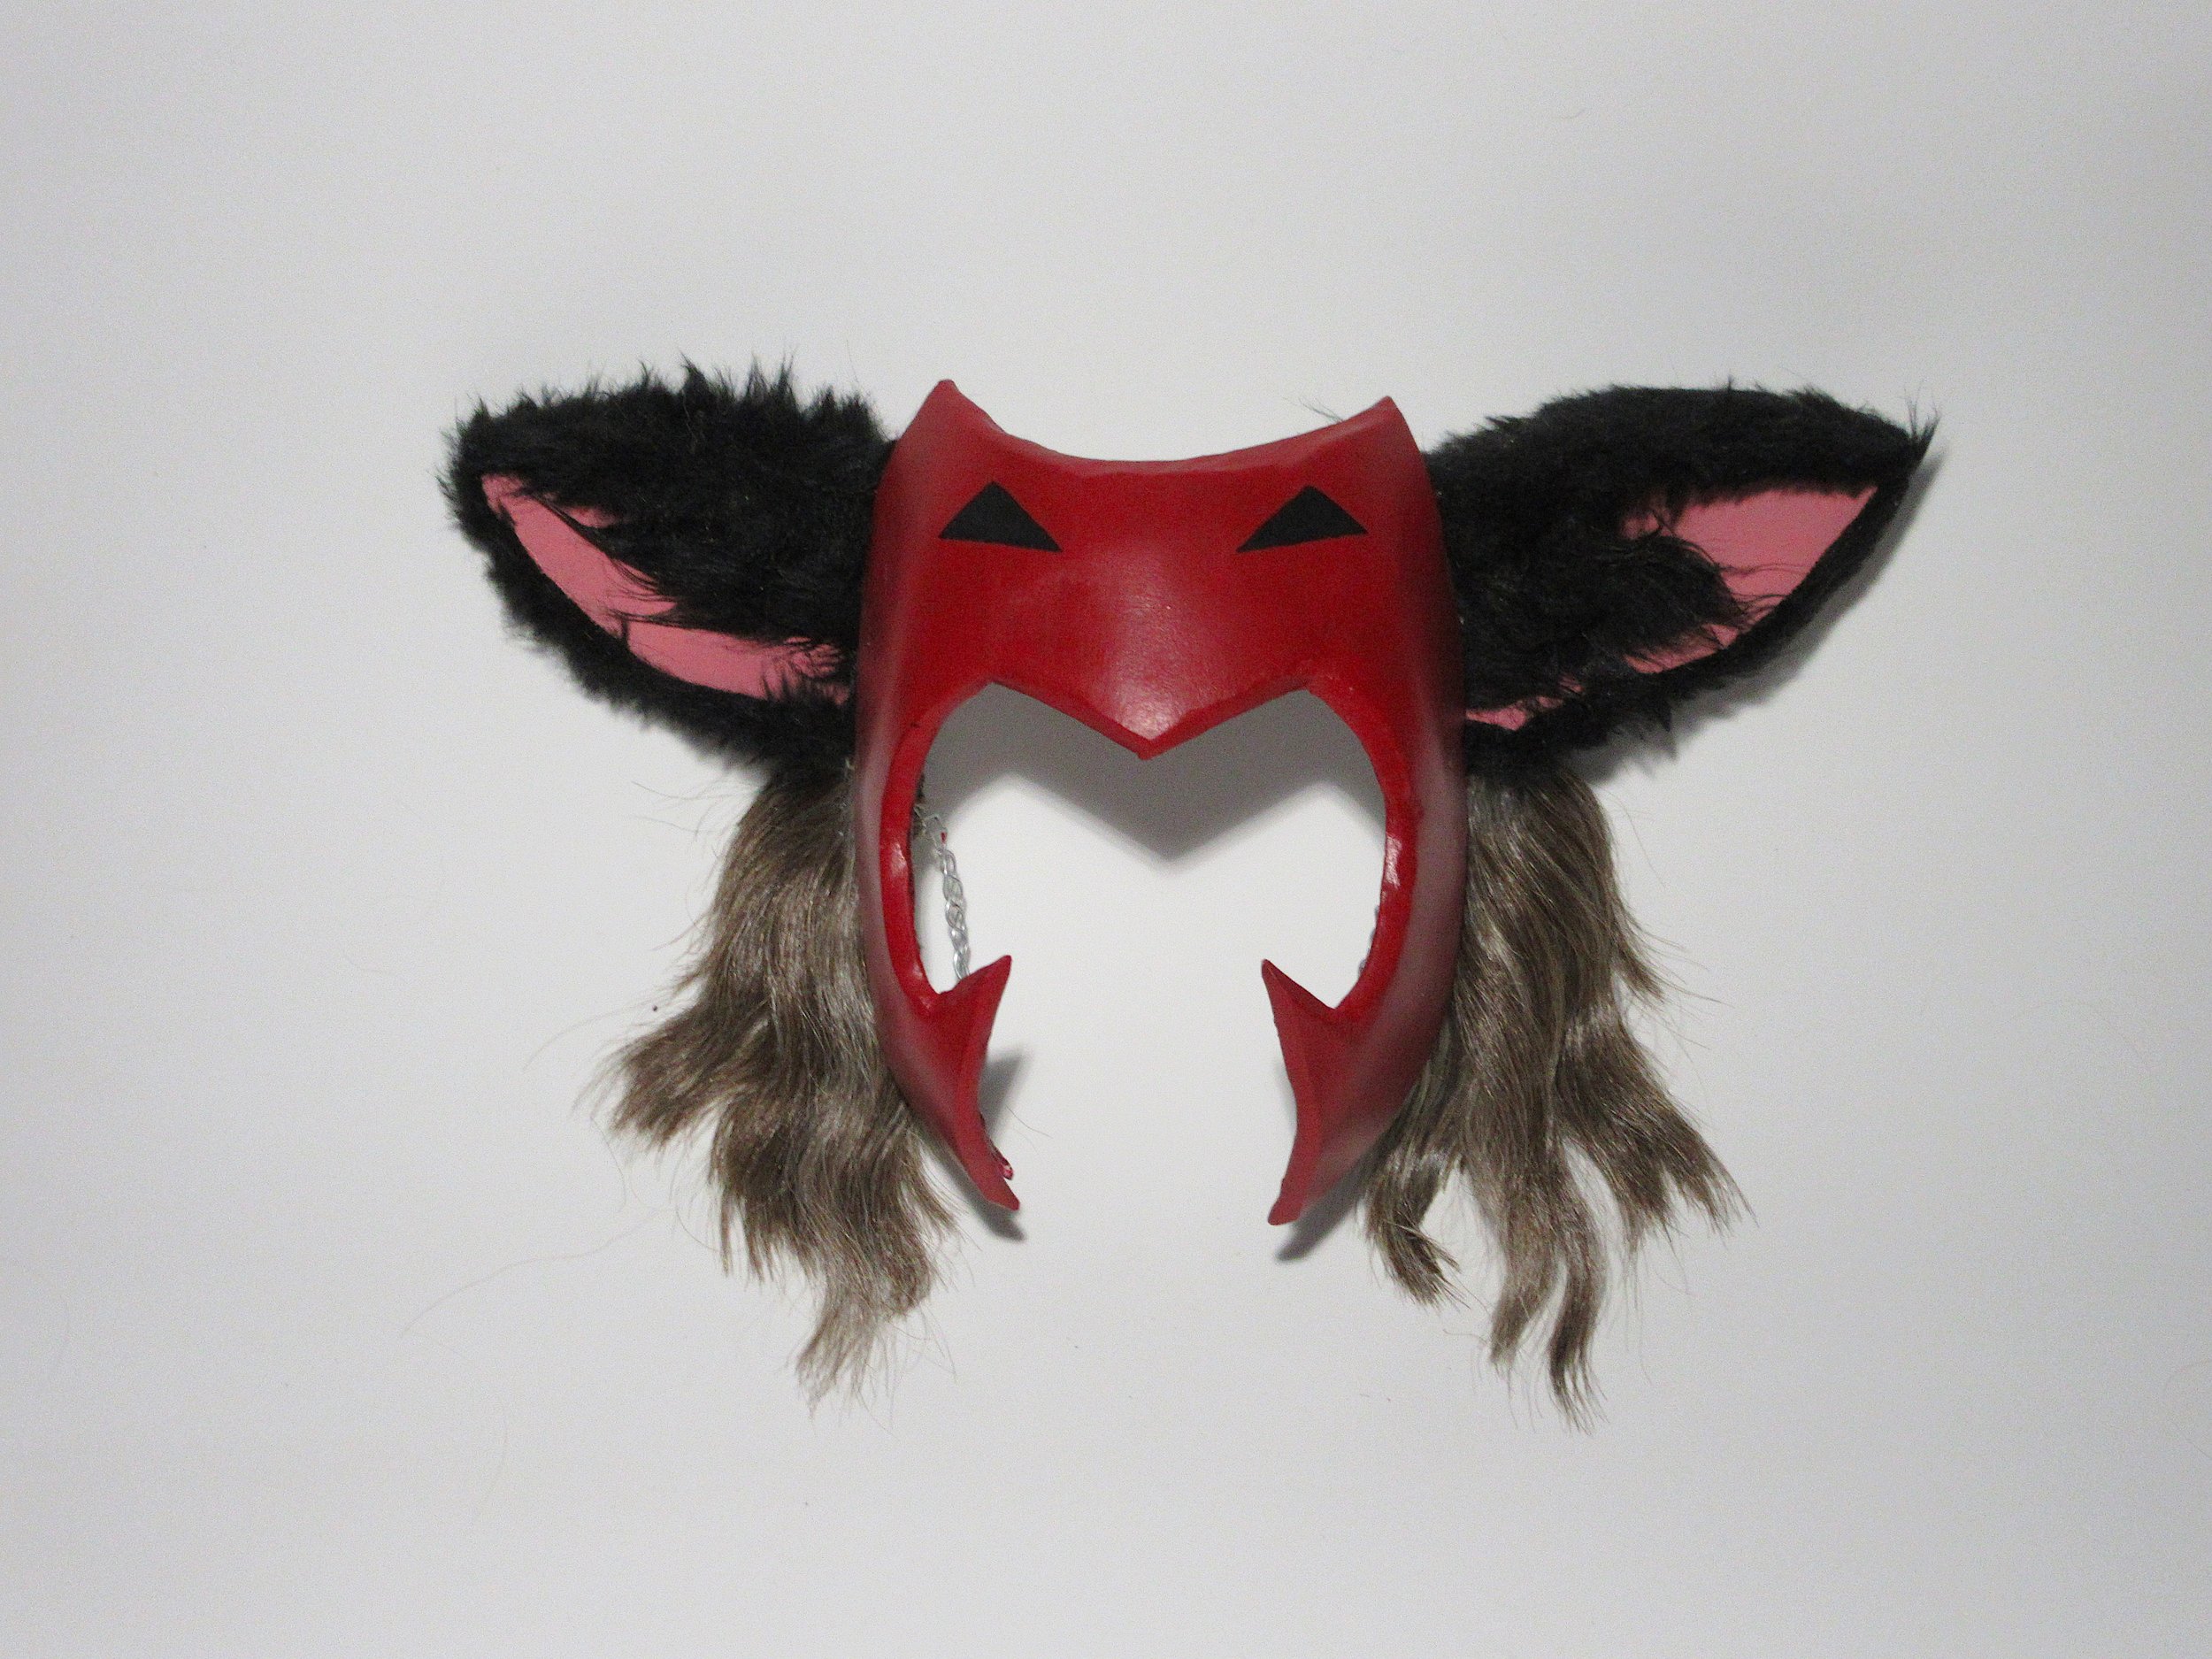
Catra’s Headpiece - Shera
As mentioned earlier, sometimes the physics of a character defies real-world physics. This was the case with Catra’s headpiece, which seemed to click on and off her face without any visible attachments. To achieve this effect, I knew I had to hide the points where it attached to my face and head.
After some planning, I discovered that I could cover the loops that go over my ears with the character’s ears and tufts of hair. This solution addressed three challenges at once: hiding my ears, securing the mask to my face, and seamlessly incorporating the character's ears. Additionally, I wanted the mask to maintain its shape, so I created a layer of wire sandwiched between two layers of foam.
However, that led to another problem: the mask ended up being too thick. I could tell you that I safely melted down the back of the mask to make it thinner, but that wouldn't be entirely true. Knowing that the mask was flexible and recalling my previous experiences with paint on flexible surfaces, I realized I needed to find a specialized paint suited for this type of application.
In the bottom right corner, you can see an earlier version of the hair tufts, where the hair was completely coated in contact cement. I decided that this approach looked tacky and didn’t sufficiently cover my ears, so I began experimenting with different methods for combining the loose hairs to achieve a more natural appearance. I applied the same technique used for lash extensions, working with small sections of hair and gradually building up layers from the bottom to the top, trimming as needed to reach the desired shape, and removing any excess or loose hairs.

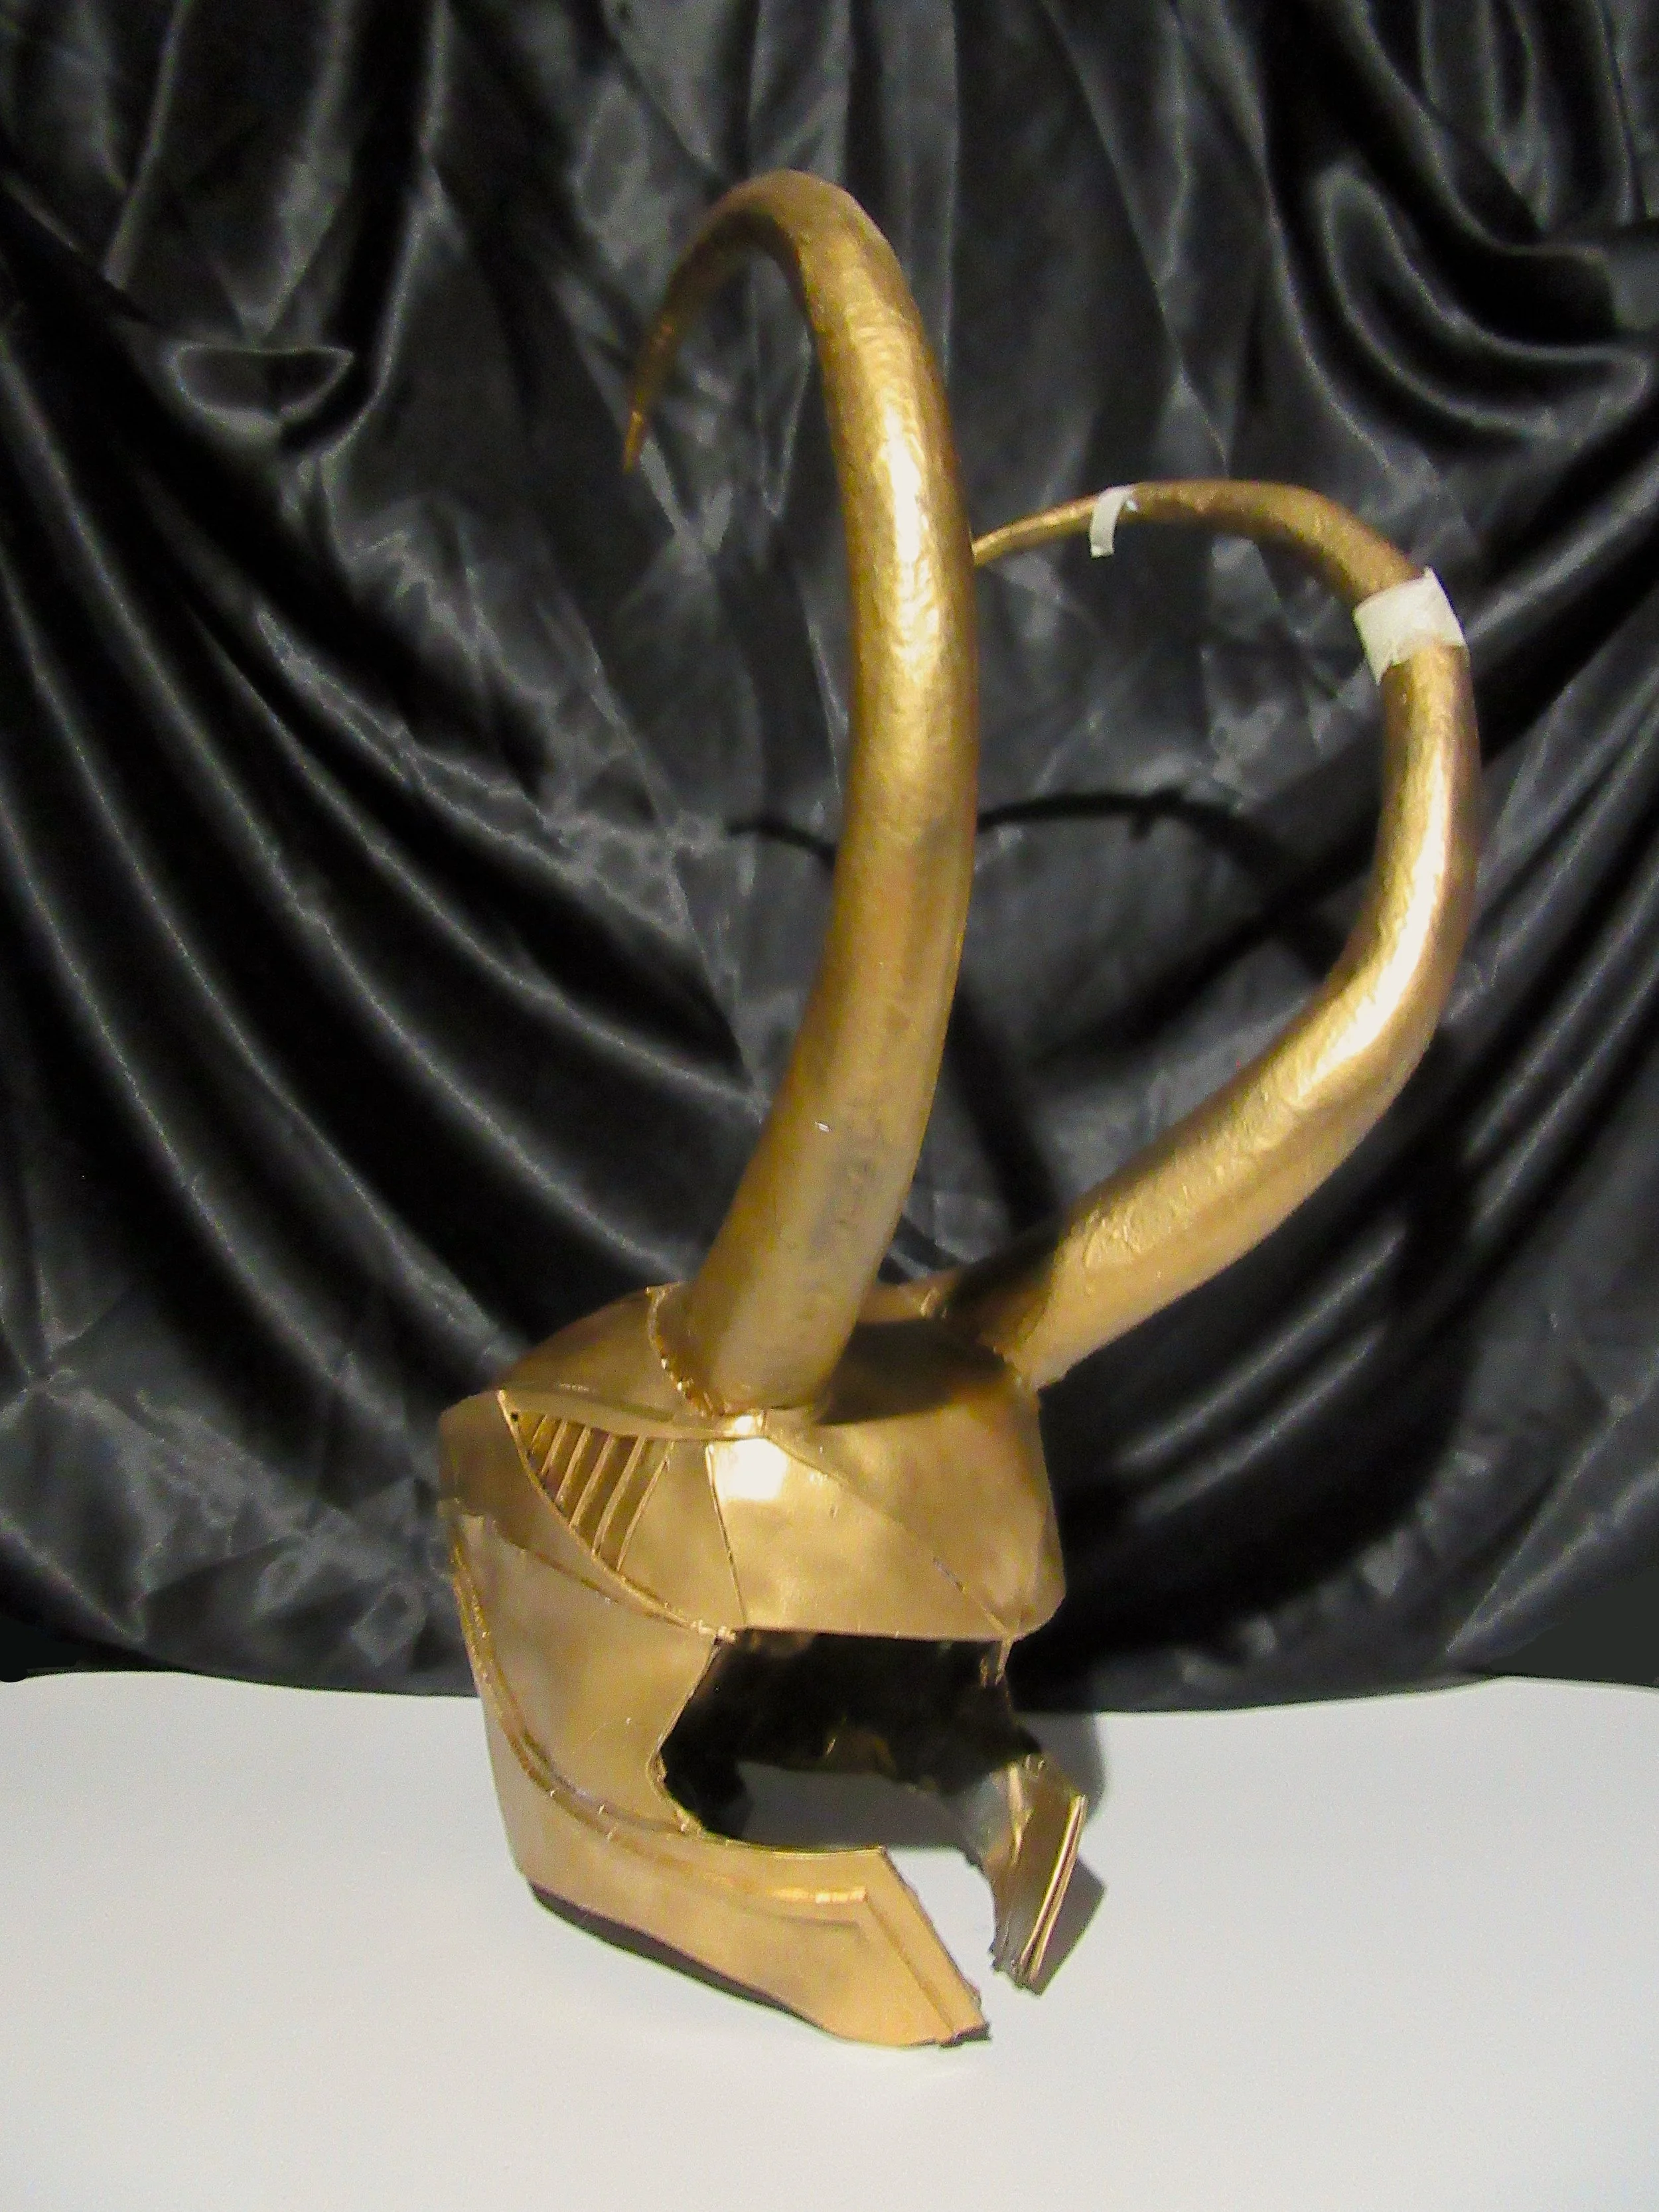
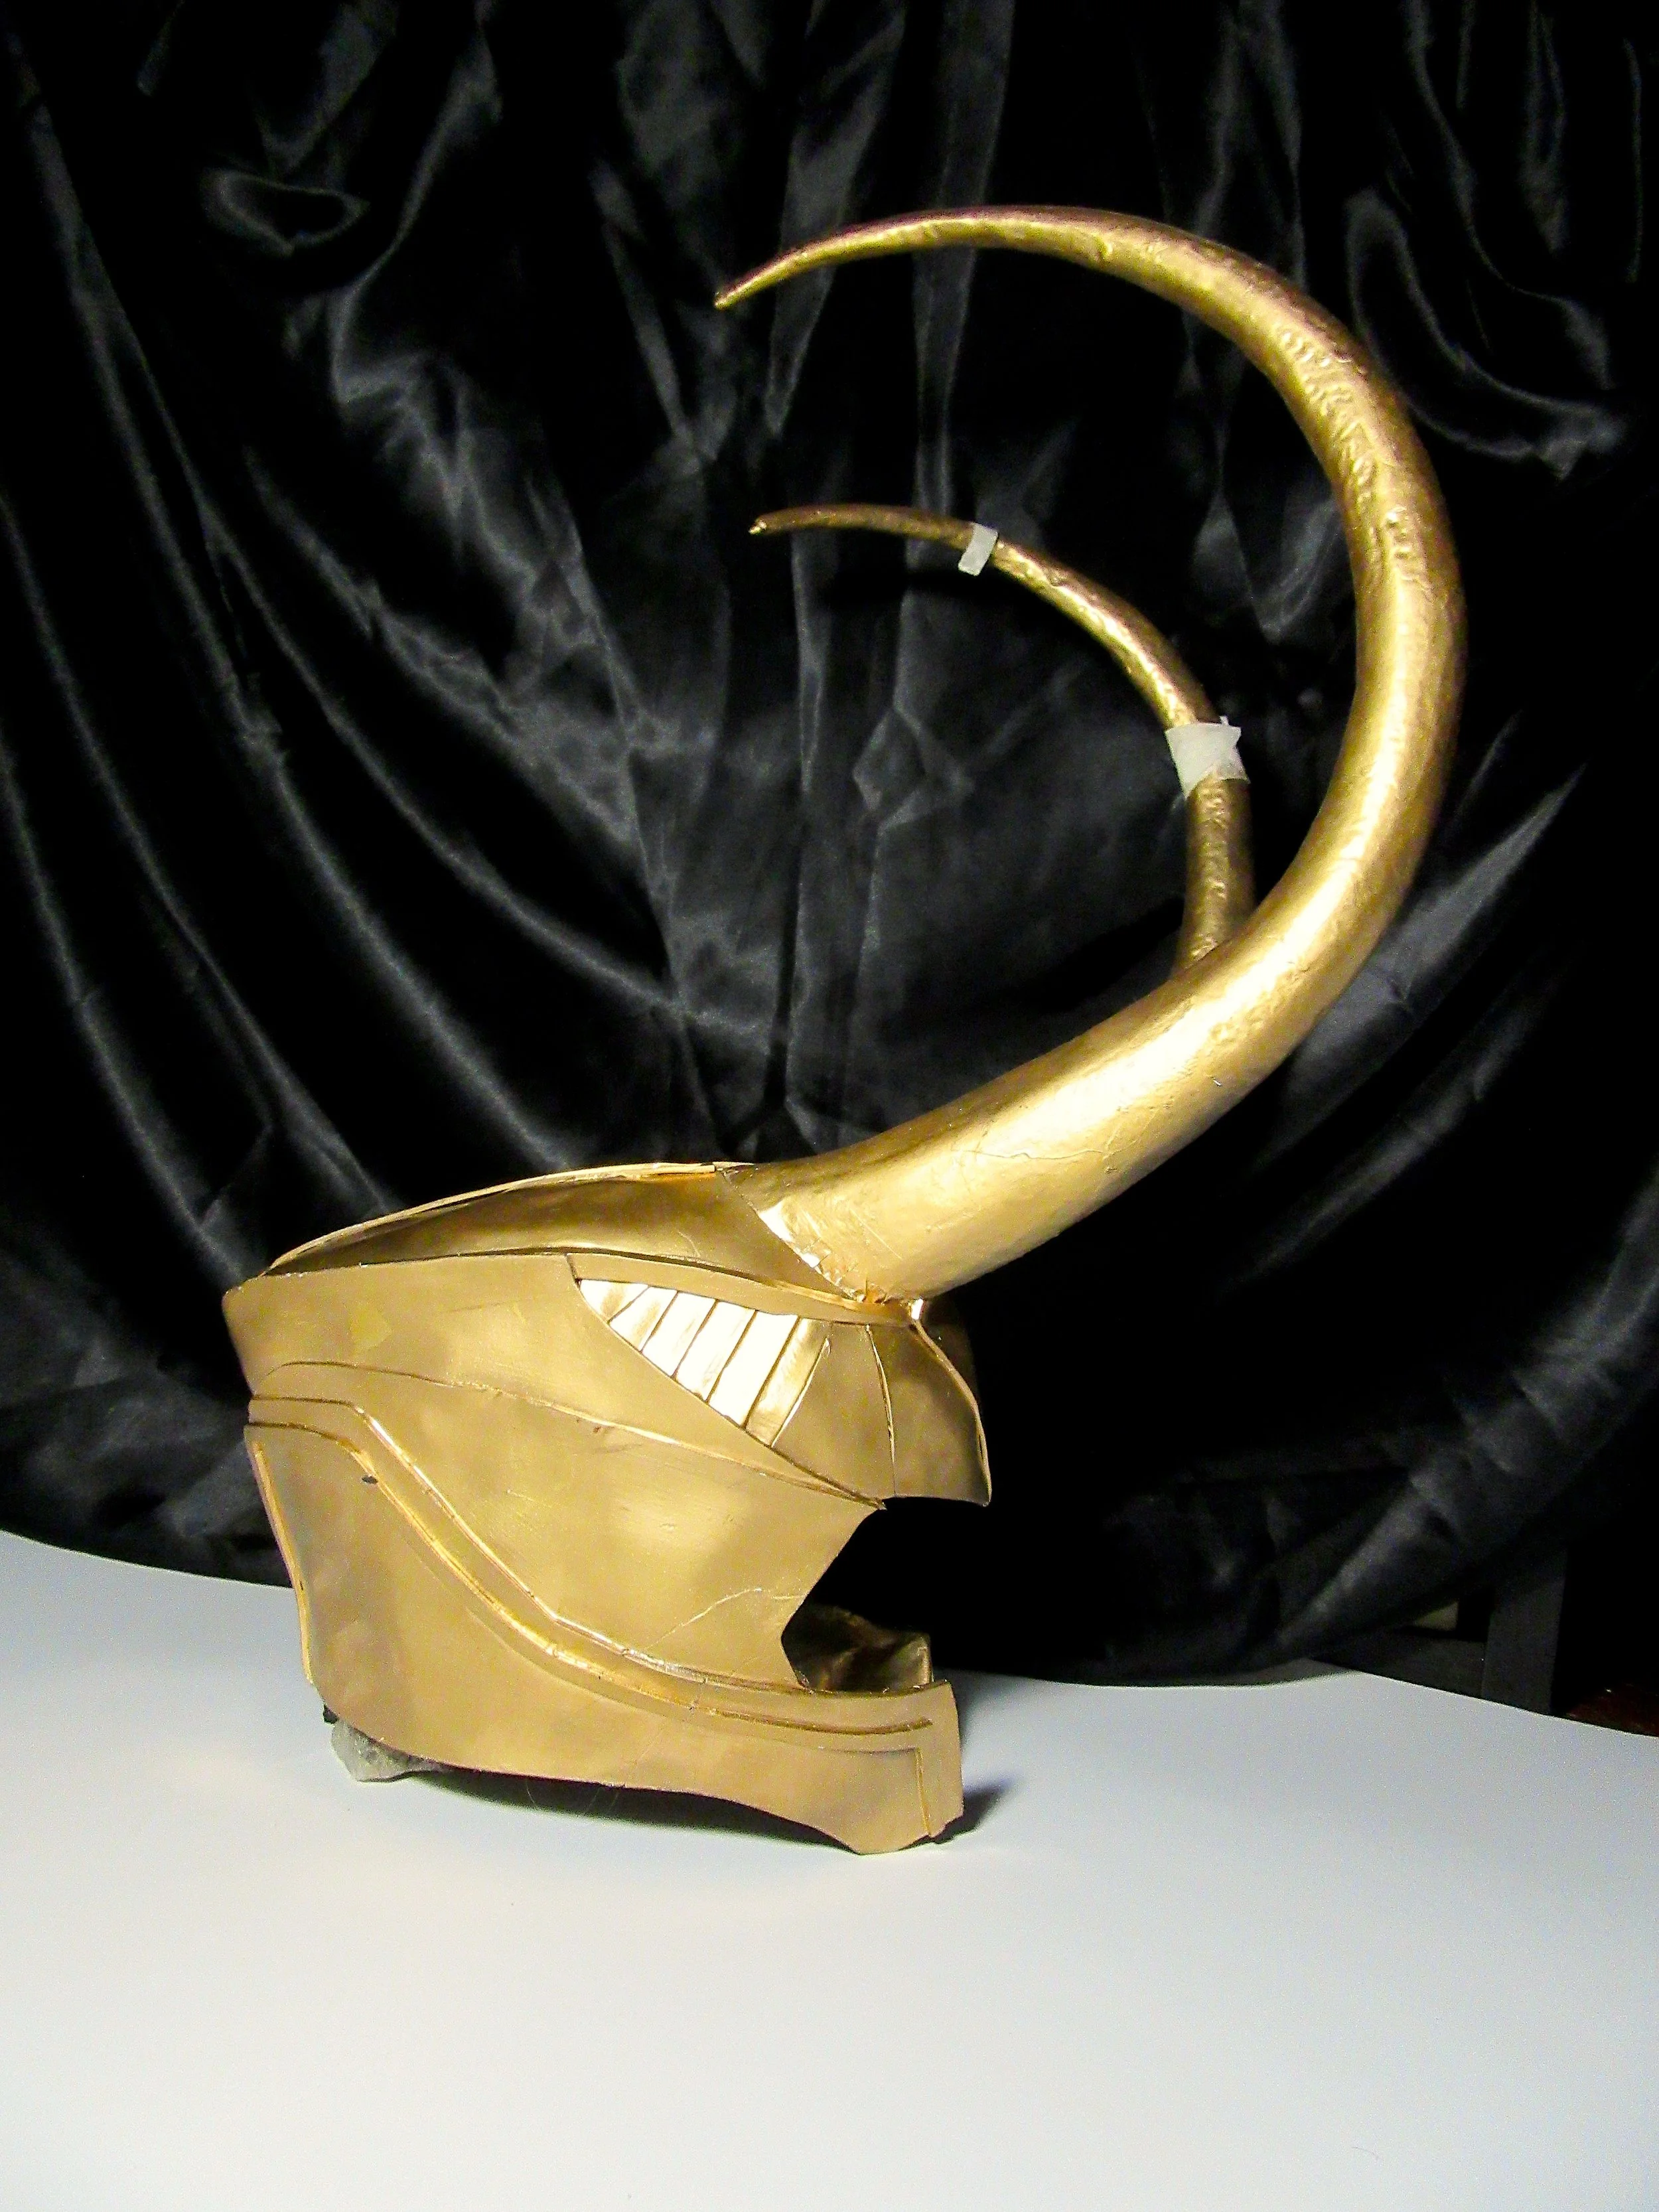
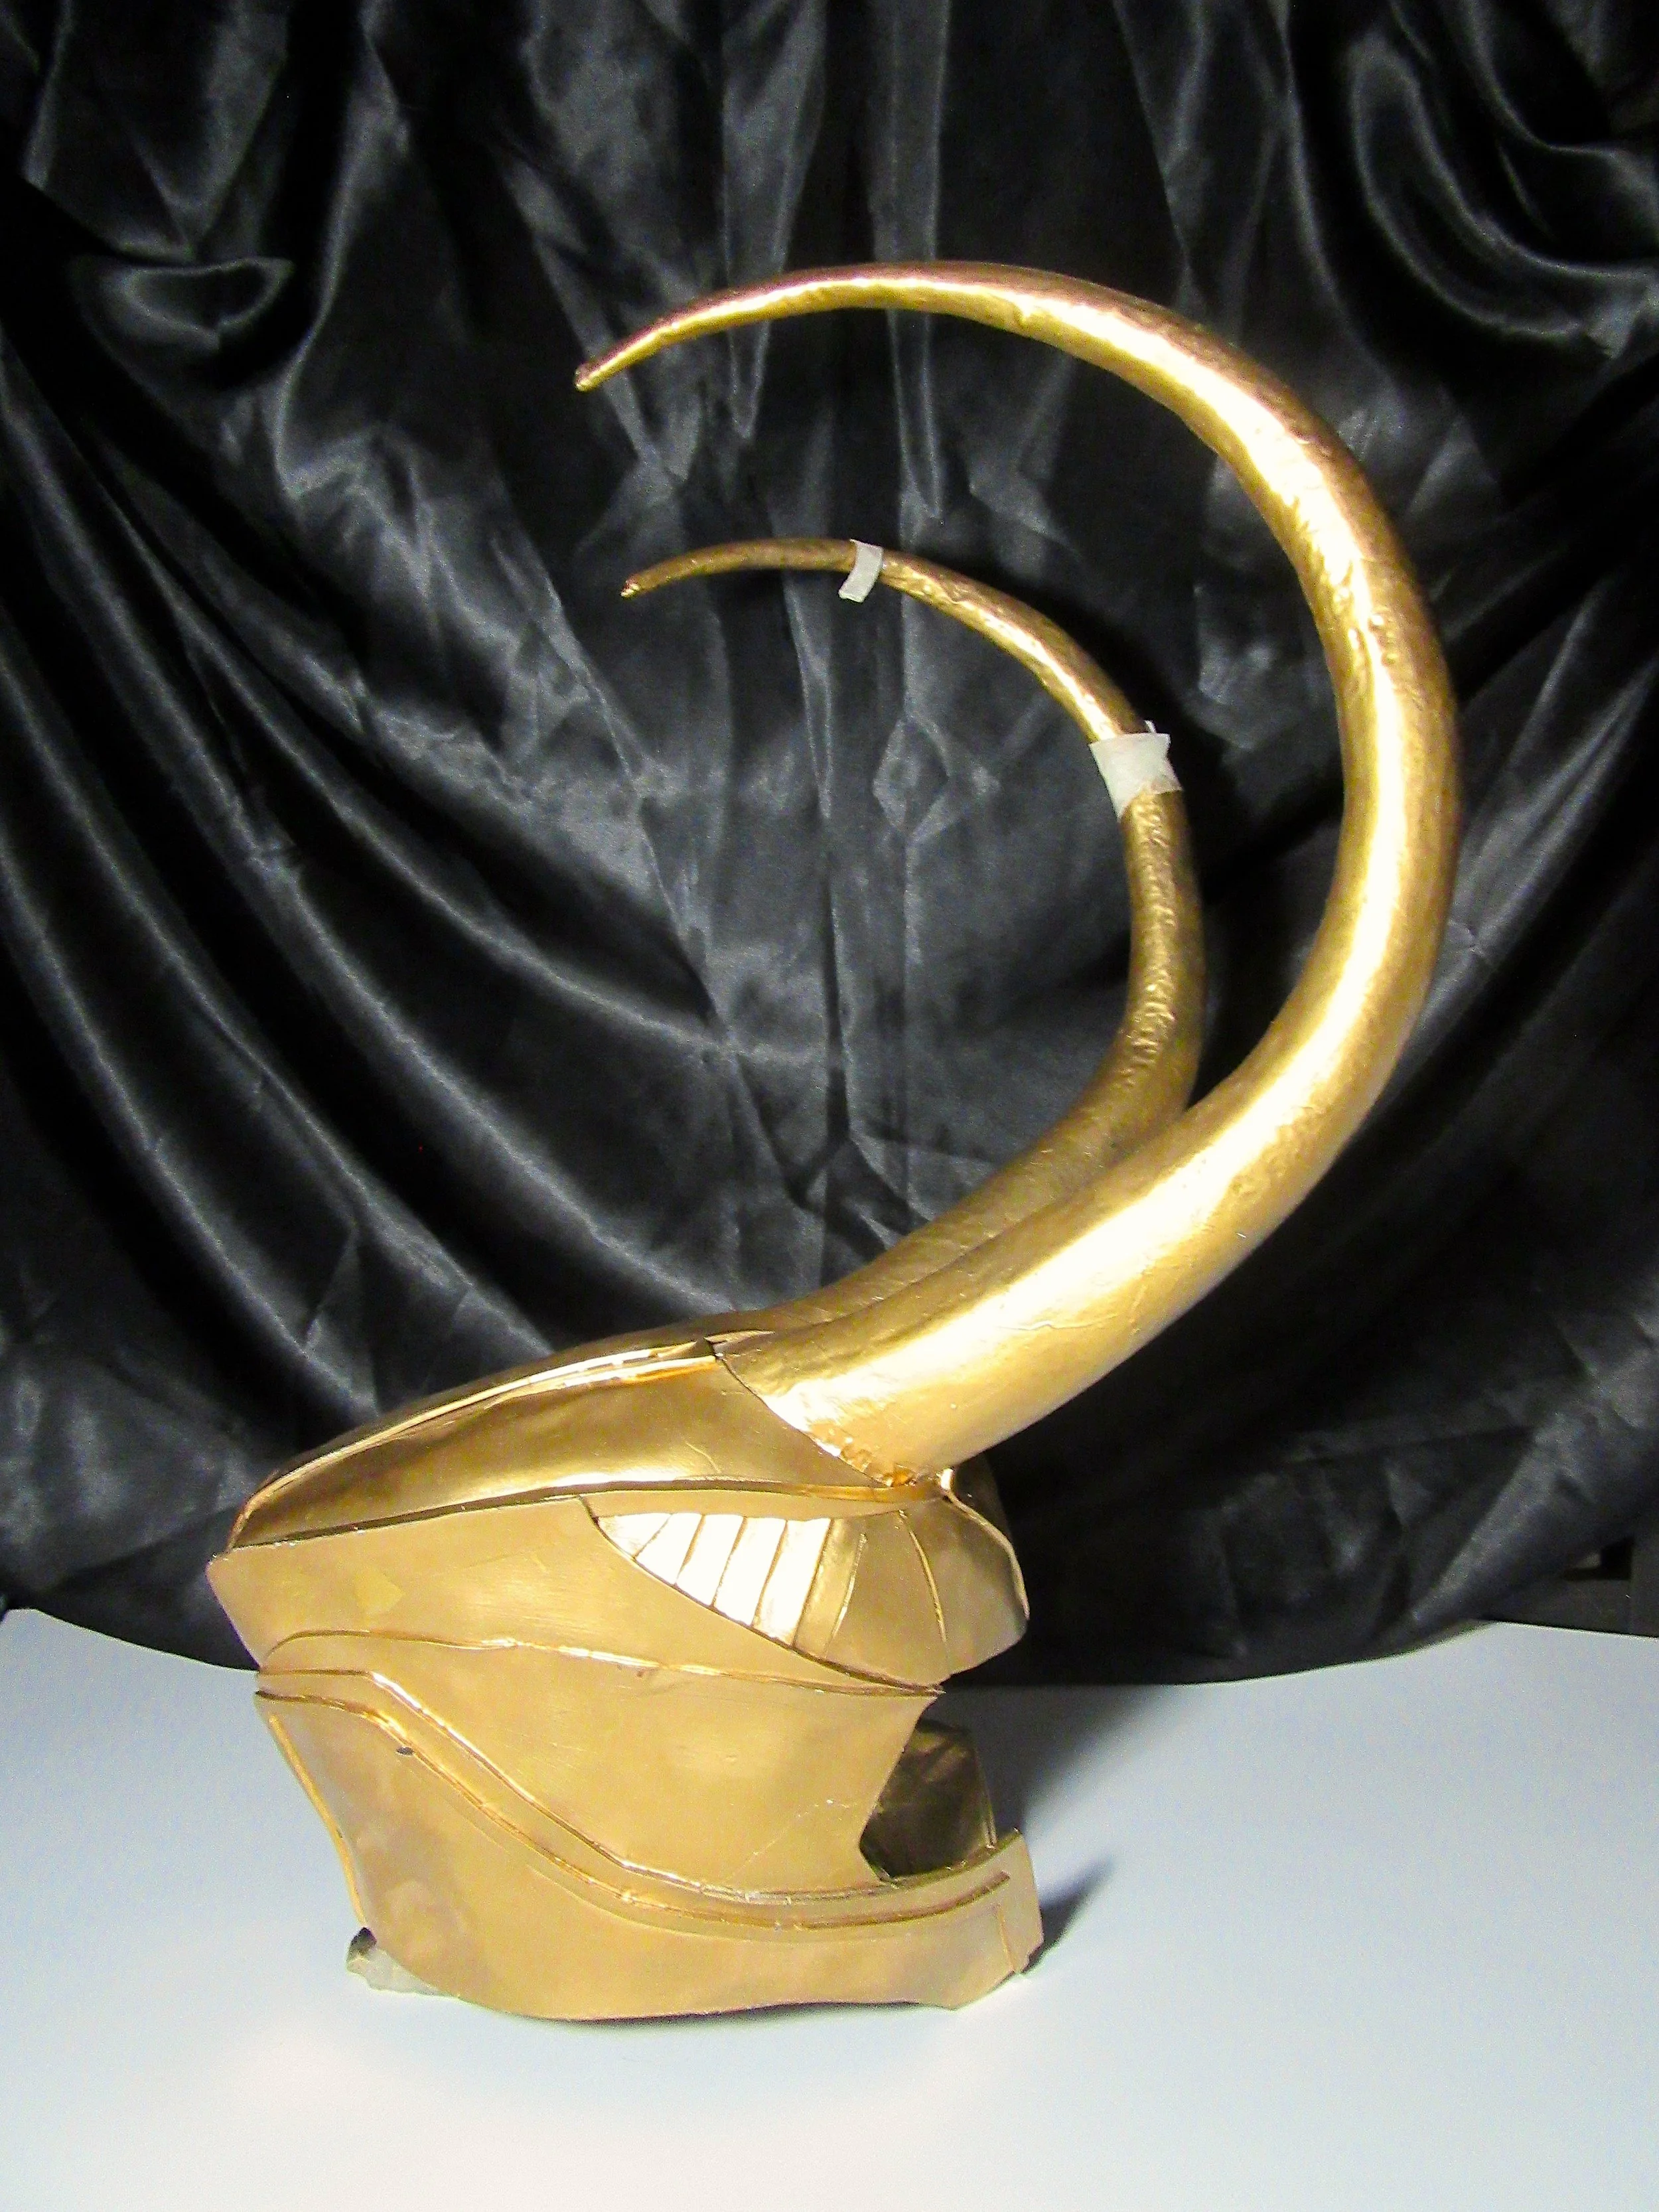
Loki’s Helmet - Darkworld
This project required extensive planning and research. I examined images of the prop used in the movie and quickly realized that replicating it was beyond my current skills and resources. Therefore, I began researching how others had successfully created similar props while collecting numerous reference photos to ensure both the shape and details would be accurate.
I devised a plan to make the edges of the helmet flexible, allowing them to bend enough to fit over my head while remaining fitted to my face. I accomplished this by constructing a wireframe that mirrored both the shape of my head and the helmet. To help with this process, I enlisted the assistance of a friend, as attempting to shape the wireframe on my own would have resulted in a lot of hair loss.
Once the base was complete, I created a scaffolding to support the foam, ensuring it maintained the shape of the helmet. I reinforced this structure with masking tape. The horns presented a significant learning curve and taught me that some aspects require more testing and planning than others. The foam I initially used wouldn’t smooth out properly, so in an act of desperation, I tried using boat sealant, which also failed to smooth the surface. I learned that insulation board is not suitable for making horns; it can be brittle, as evidenced by the tape holding together damage on one of the horns from a recent move.

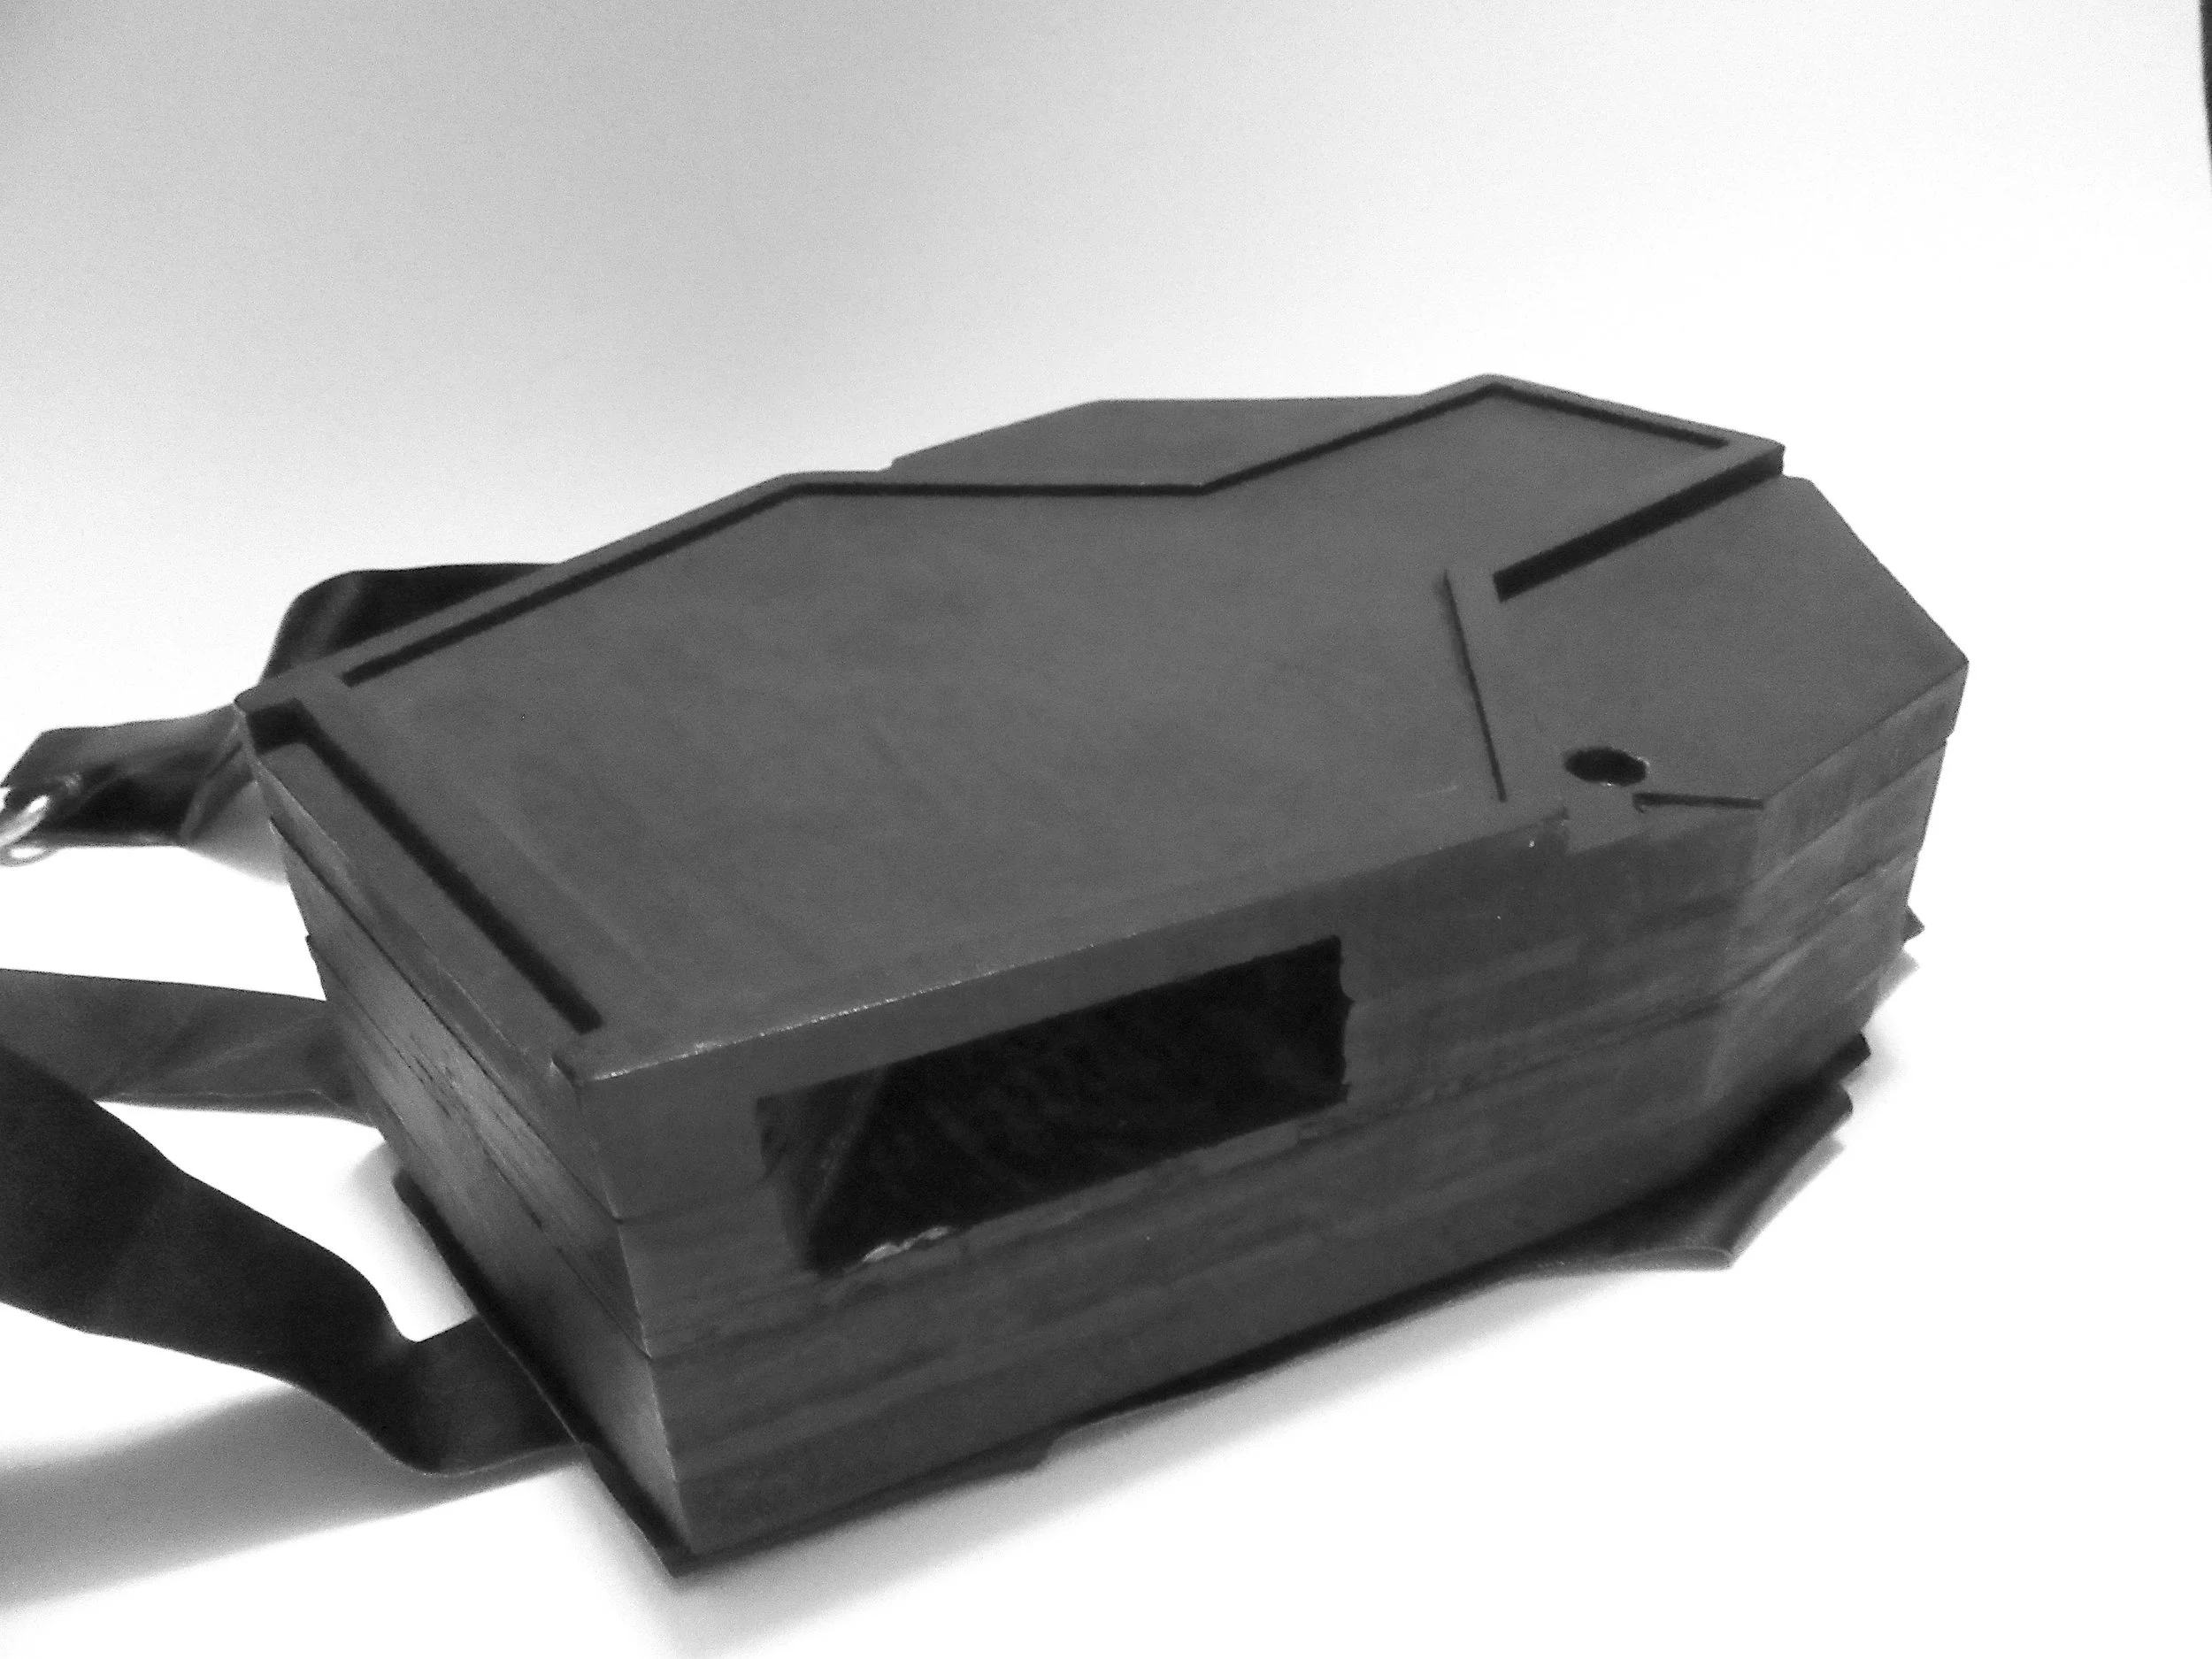
Katana Holder - Deadpool
This project was my first experience with CNC machines and 3D modeling. I used Google SketchUp to create the three separate pieces that make up the final product. I received assistance in converting my drawings into a file that the CNC router could use and in operating the CNC machine, as I was young and the machine was quite expensive.
The design consists of three parts: top, middle, and bottom. This allows the sheaths of the swords to be removed for easier packing, especially since this costume will be worn 1,000 miles away from where I created it. It is worth noting that this is not an exact replica of the movie prop, partly because the swords I purchased were larger than the originals.

Future Projects
In future projects, I want to incorporate LED strips into armor or props to create a glowing effect. I also aim to include more moving parts, either using motors or by utilizing my own movement within the costume. One of my goals is to use my SolidWorks skills to model ODM gear and print it in sections to achieve the highest accuracy possible. Additionally, I might consider using metal CNC machining to ensure the material is similar to the original design.
I do not own any of the characters mentioned above nor do I intend to make a profit from their likeness.
Pretty please don’t sue me, Disney.